Phone Number Verification Quickstart
Getting Started
To begin using Phone Number Verification, you need four things: A Syniverse Developer Community (SDC) account, enabled service offerings, an application and an access token.
- A Syniverse Developer Community Account – Sign up for an account at https://developer.syniverse.com/. You must request a postpaid account. This postpaid account uses the same Bearer Token as your prepaid/trial account. When requesting the postpaid account, you must accept the Terms and Conditions of the SDC portal to be production ready. Once requested, the postpaid account request is reviewed by the Syniverse Legal and Finance departments and then implemented. The process takes about three weeks from request to finish. Once your postpaid account is set up, you can reset the bearer token.
Note: For Canada PNV, you are required to be whitelisted by the authorities of that country to receive PNV attributes for Canadian phone numbers. If no whitelisting is present, the default response from the PNV platform is to return an “authorization is required” error.
- Enabled Service Offerings for Phone Number Verification and Developer Community Gateway.
To enable a service offering:
-
- Go to the Service Offerings tab.
-
- Click Phone Number Verification Service. The details and pricing page displays.
- Click the arrow to expand Subscriptions.
- Click Subscribe … and a pop-up displays.
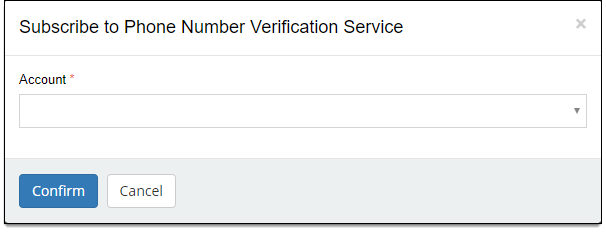
-
- Select your Account from the drop-down.
- Click Confirm.
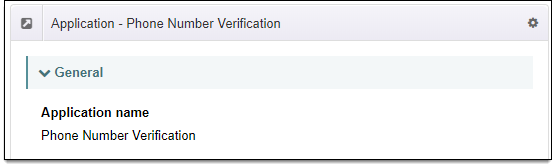
- An Application with enabled APIs – to enable the APIs you create a new application or edit an existing one:
-
- Click Create New or click on the application name to edit an existing application.
- Click on the button to toggle SDC Gateway Services and Phone Number Verification Service to ON.
-
- Click Save.
- An Access Token. The access token displays under Auth Keys.
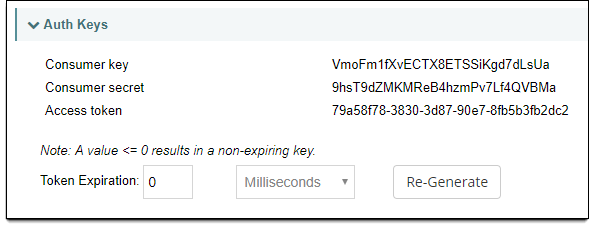
With these four things in place, you are ready to perform a lookup.
Understanding Feature Sets
Before you perform a lookup, it’s important to understand the feature sets the service offers. Phone number verification offers multiple feature sets – premium, standard and legacy – at varying price points. We have evolved our feature sets over time, but have retained legacy feature sets for backwards compatibility.
Features Sets are split between Recommended Feature Sets - these are feature sets which we recommend that customers use; and Legacy Feature Sets - we no longer recommend new customers use these feature sets, but we still support them for existing customers.
Note: If the request does not specify a feature set, the default feature set is the legacy de-activation feature set (fs1). This means if you do not specify the standard or legacy feature set, you are billed at the premium rate. If disconnection information is required then the premium disconnection (fs5) feature set should be used. For more information on pricing, please contact your account manager.
Recommended Feature Sets
Standard (fs2)
This Standard feature set (fs2) is available for global numbers. When using this feature set, you must specify fs2 in the request. This feature set includes the number, validity and carrier information.
Regulations require you to be whitelisted to look up Canadian numbers. If not whitelisted, an authorization error is returned (i.e. Canadian Number – further authorization is required).
Premium Disconnection (fs5) (for United States only)
This premium feature set is available for US numbers only. When using this feature set, you must specify fs5 in the request.
This is the recommended feature set for US customers as it provides additional information enabling better management of US mobile numbers in their subscriber databases.
As well as standard information, disconnect data is also provided. This enables customers to remove mobile numbers which are likely to be re-assigned to new user. This reduces cost, end user frustration.
The disconnect data feed provides key improvements to free de-activation data. By combining multiple data sources, it filters out de-activated mobile numbers which will not be re-assigned, such as mobile numbers which are being ported between carriers.
This minimizes disruption to ported users and reduces re-acquistion costs.
Legacy Feature Sets
These feature sets are provided for backwards compatibility purposes for existing customers. All new customers should use the recommended feature sets above.
Legacy (fs23)
The Legacy feature set (fs23) is available for global numbers. When using this feature set, you must specify fs23 in the request.
Legacy Premium De-activation (fs1) (for United States numbers only)
The Premium feature set (fs1) is available for lookup of United States numbers. This feature set includes the number, validity and carrier information and supports additional deactivation attributes for (US numbers). As the default feature set, you are not required to specify the feature set in your request.
Supported Attributes by Feature Set
The table below lists all supported attributes per feature set.
Standard (fs2) |
Premium Disconnection (fs5) |
Legacy (fs23) |
Legacy Premium De-activation (fs1) |
|
number |
number |
number |
number |
|
validity |
validity |
validity |
validity |
|
carrier_id |
carrier_id |
carrier_id |
carrier_id |
|
carrier_name |
carrier_name |
carrier_name |
carrier_name |
|
number_type |
number_type |
number_type |
number_type |
|
country_iso_code |
country_iso_code |
country |
country_iso_code |
|
country |
country |
porting_status |
country |
|
carrier_mcc |
carrier_mcc |
carrier_mcc |
carrier_mcc |
|
carrier_mnc |
carrier_mnc |
carrier_mnc |
carrier_mnc |
|
ext_trx_id |
last_known_event |
nisds |
account_type (no longer populated) |
|
ext_reseller_cust_id |
disconnect_date |
deactivation_detail carrier_id carrier_name deactivation_date |
last_known_event |
|
tracking_id |
ext_trx_id |
ext_trx_id |
porting_date (no longer populated) |
|
ext_reseller_cust_id |
ext_reseller_cust_id |
previous_carrier_id |
|
|
tracking_id |
tracking_id |
previous_carrier_name |
|
|
deactivation_date |
|||
|
ext_trx_id |
|||
|
ext_reseller_cust_id |
|||
|
tracking_id |
Getting Started with Batch Processing
While performing a single number lookup is valuable, there may be times when you have a set or group of numbers you need to process. Batch processing makes this an easier task. With batch processing you can send a file that contains multiple phone numbers and the system performs a lookup for each number within the file as a batch process. To process batches of phone numbers, you need to turn on Batch Automation, Media Storage (Media Storage allows for the storage of files) and Event Manager (which allows you to receive batch job status notifications.). Once enabled, you need to regenerate the Access Token.
To enable Batch Automation and Media Storage:
Note: The steps below assume Phone Number Verification is already enabled.
- Go to the Applications tab and click on the application name. The application opens.
- Click on the wheel icon in the upper right to edit the application.
- Select Edit. The application can be edited.
- Expand Account & APIs.
- Select your Account from the drop-down. The APIs display.
- Click to toggle Batch Automation to ON.
- Click to toggle Media Storage to ON.

- Click to toggle Event Monitoring to ON.

- When you make changes to the enabled APIs for an application, you must regenerate the access token. While editing the application:
- Expand Auth Keys.
- Click Re-Generate. The new key is generated.
- Expand Auth Keys.
- Click Save to save the application.
You are now ready to begin scheduling batch jobs. For more information, see the Batch Automation for PNV User Guide.
Getting Started with Event Monitoring
You can proactively monitor a set of phone numbers and receive alerts when the number experiences a change. This ability is available by adding the Event Manger service to Phone Number Verification. Event Manager is available for all users and companies in the Syniverse Developer Community and its purpose is to send alerts from a Syniverse solution back to your environment.
For Phone Number Verification, the monitoring service can alert you to the following changes:
- Deactivation Status
- True Disconnects
To get started, you need to enable Event Manager in your Phone Number Verification application.
To enable Event Manager:
Note: The steps below assume you have already enabled Phone Number Verification.
- Go to the Applications tab and click on the application name. The application opens.
- Click on the wheel icon in the upper right to edit the application.
- Select Edit. The application can be edited.
- Expand Account & APIs.
- Select your Account from the drop-down. The APIs display.
- Click to toggle Event Subscription Services to ON.

- Click Save.
Once the service is enabled, you are ready to establish your delivery configurations – used to send real-time events – then schedule when you want to receive delivery and finally, subscribe to receive notifications. For more information, see the Event Manager for PNV User Guide.